-
We are going to create a "Jumper"game that initially launches the player’s character up the screen, and then gravity will continuously try to pull the player back down
Collecting special objects will boost the player upward and the player can be moved onto platforms that will provide temporary respite from the pull of gravity.
The accelerometer will handle the player’s left and right movement (x-axis).The result will be a complex, hybrid physics manipulation, as you both apply forces to the player node and also directly change its velocity.
1) To begin, we will need to create some imagery (saved as Photoshop files) for our new Xcode project:Player@2x - 90 pixels (W) x 100 pixels (H) @ 150 (res)Platform@2x - 90 (W) x 64 (H) @150 (res)
Special@2x - 80 x 80 @ 96TapToStart@2x - 440 (W) x 292 (H) @150 (res)Background@2x - 640 (W) x 2560 (H) @ 150 (res)2) Create a new project for a "Jumper" gameBegin by creating a new game project in Xcode:- Click Create a new Xcode project from the Welcome screen:
Or
- Select File > New > Project… from the file menu:
3) When the new project window appears, choose Game from under the iOS > Application category and press Next.The next window beckons you to customize options for your project. Fill out the fields described in the table below:
Product Name: JumperOrganization Name: NeshaminyOrganization Identifier: org.NeshaminyLanguage: SwiftGame Technology: SpriteKitDevices: iPhoneSwift is Apple's latest programming language.
SpriteKit is a set of APIs provided by the iOS SDK (software development kit)
which allow native 2D game development from within Xcode.4) Press Next and Xcode will ask where to place your new project (in the folder with you game images would work).
Check Create Git repository, and then click Create.5) After saving it should open Xcode to your brand new project, specifically to the project properties screen.
On this screen, under Device Orientation: uncheck landscape left & landscape right.7) Open GameViewController.swift and delete the6) Open Project Navigator by either clicking the folder icon (top left) or pressing ⌘ + 1:
Right-click GameScene.sks and choose the Delete option:
When asked to confirm, make sure to choose Move to trash:
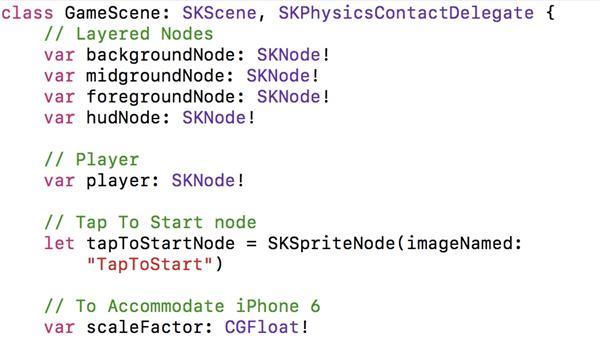
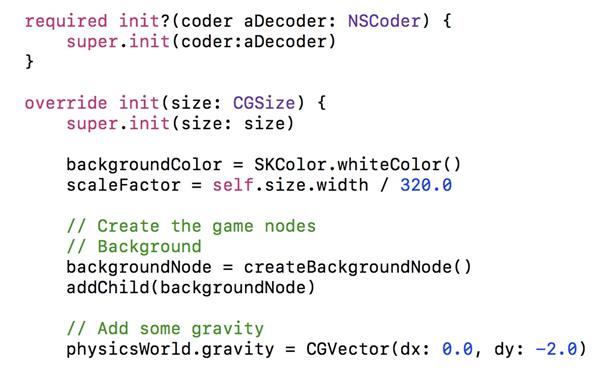
unarchiveFromFileSKNode extension at the top of the file (we won’t be needing this code).8) Then replaceviewDidLoadwith the following:override func viewDidLoad() { super.viewDidLoad() let skView = self.view as! SKView skView.showsFPS = true skView.showsNodeCount = true let scene = GameScene(size: skView.bounds.size) scene.scaleMode = .AspectFit skView.presentScene(scene) }9) Make the begining of the GameScene.swift file look like:import SpriteKit class GameScene: SKScene { required init?(coder aDecoder: NSCoder) { super.init(coder: aDecoder) } override init(size: CGSize) { super.init(size: size) backgroundColor = SKColor.whiteColor() } }10) We are going to use parallaxed layers to produce some complex movement of the game images. (Eg. things in front move faster than things in the background.) To produce this effect we will need to create the following layers:
• Background: a slow-moving layer that shows the distant landscape.
• Midground: faster-moving scenery made up of tree branches.
• Foreground: the fastest layer, containing the player character, stars and platforms that make up the core of the gameplay.
• HUD: the top layer that does not move and displays the score labels.
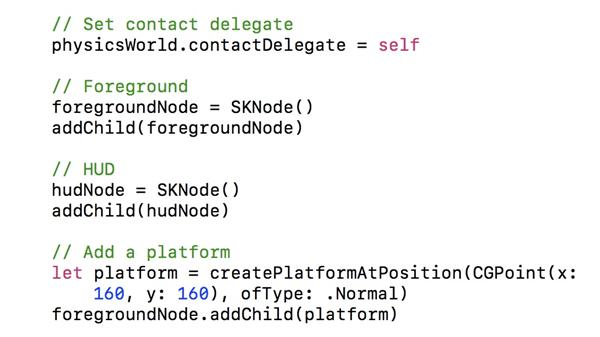
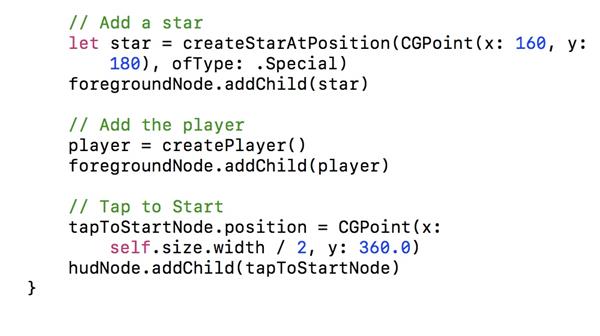
In the GameScene.swift file, change the GameScene class to this:

 }
}

