-
11. We'll begin by establishing GameScene inside of GameViewController.
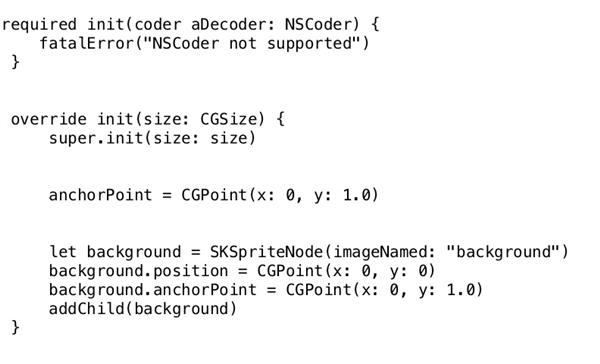
GameScene will be responsible for displaying everything for Blocktris: it will render the Tetrominos, the background, and the game board. Furthermore, GameScene will be responsible for playing the sounds and keeping track of the time.GameViewController will be responsible for handling user input and communicating between GameScene and a game logic class you will create by typing in some code (which will give you a feel for the Swift language).
In Xcode, in the GameScene.swift file you will need to add some code AFTER
override func update(currentTime: CFTimeInterval) {
/* Called before each frame is rendered */
}
(BUT BEFORE THE LAST CURLY BRACKET)add the following code: 12. We will need to create an array that will access each location on our game board by its row and column value.
Our game board will have 20 rows and 10 columns gives us 200 possible locations for a block to occupy. We'll organize these locations into an array and reference them using a custom subscript: array[column, row]. Swift arrays by default have a single valued subscript - array[index] - but Swift allows us to create our own as well.
Make a brand new file by pressing ⌘ + N or File > New > File…, the following window should appear: (Make sure to highlight the "Bloacktris" folder, as the image shows below)
Choose Swift and press Next. Name the file, Array2D and click Create
The file should automatically open in the editing window.
Delete the line:import Foundation
And then add the following code:
Let's briefly discuss what this class does.
At #1 we're defining a class named Array2D. Generic arrays in Swift are actually of type struct, not class, but we need a class in this case such that wherever we use the game board array in the project, we will manipulate the same data.We may pass class objects by reference (same data) whereas we must pass structures by value (copied data). Our game logic will require a single copy of this data structure to persist across the entire game.
Notice that in the declaration of this class, we provide a typed parameter: <T>. This allows our array to store any data type and remain a general-purpose tool.
At #2 we declare an actual Swift array; it will be the underlying data structure which maintains references to our objects. It's declared with type <T?>. A ? in Swift symbolizes an optional value.
An optional value is just that, optional. Optional variables may or may not contain data, and they may in fact be nil, or empty. nil locations found on our game board will represent empty spots where no block is present.
During our initialization at #3, we instantiate our internal array structure with a size of rows x columns. This guarantees that Array2D can store all the objects our game board requires, 200 in our case.
And at #4 we create a custom subscript for Array2D. We mentioned earlier that we wanted to have a subscript capable of supporting array[column, row], this accomplishes that. The getter is self-explanatory. To get the value at a given location we need to multiply the provided row by the class variable columns, then add the column number to reach the final destination.
The setter is the reverse operation of that; we assign newValue to the location determined by the same algorithm found in the custom getter.

